As stated in kit 7, I collected the smokebox along with the boiler from the
Guildford Model Engineering Show.
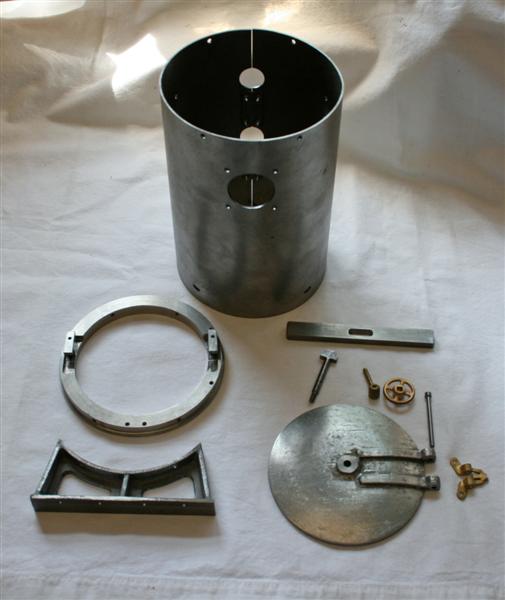
This kit consists of the smokebox and the associated ring, door, chimney, tube, dart wheel and handle, the smokebox cradle, the dummy exhaust pipes to fit on the steam chests, and the pump delivery and bypass pipes.
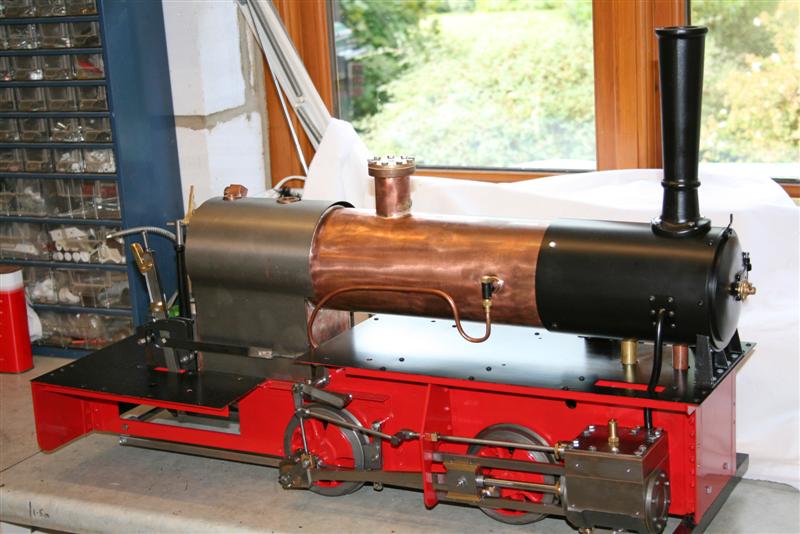
This is a picture of the pieces I have so far.
August 18th
Still waiting for the remaining parts and the instructions. In the meantime I have joined the edges of the smokebox with the plates and bolts provided, fitted the smokebox ring, cleaned up the castings for the cradle and the door and have begun to paint just for something to do!
August 28th
The missing parts of the chimney, dummy exhaust pipes, the boiler and firebox wrappers, boiler bands (no spacers yet) three boiler clack valves and the axle pump delivery pipes are here.
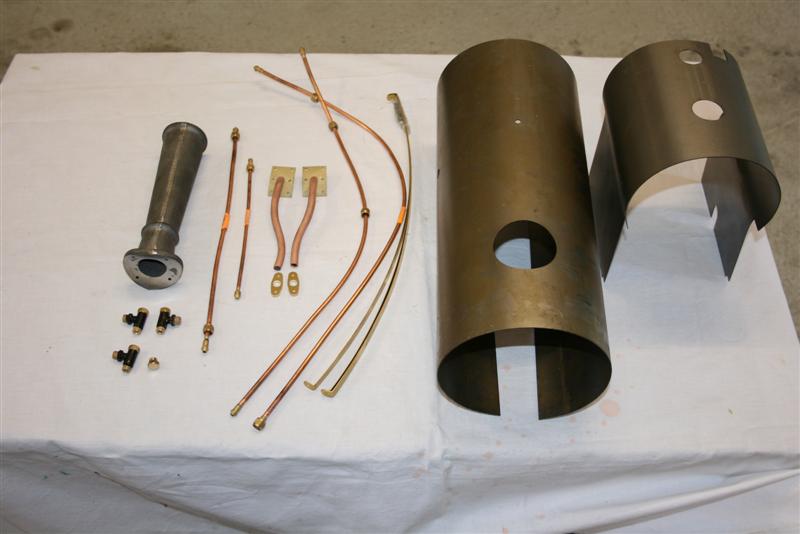
I can see how the chimney and dummy exhaust pipes fit to the smokebox which I've already assembled, so I need to go ahead and paint these new pieces first.
I don't know which pipe goes where at the moment so will have to wait for the instructions before I go that far. Hopefully Geerlig will have them to me shortly.
September 3rd
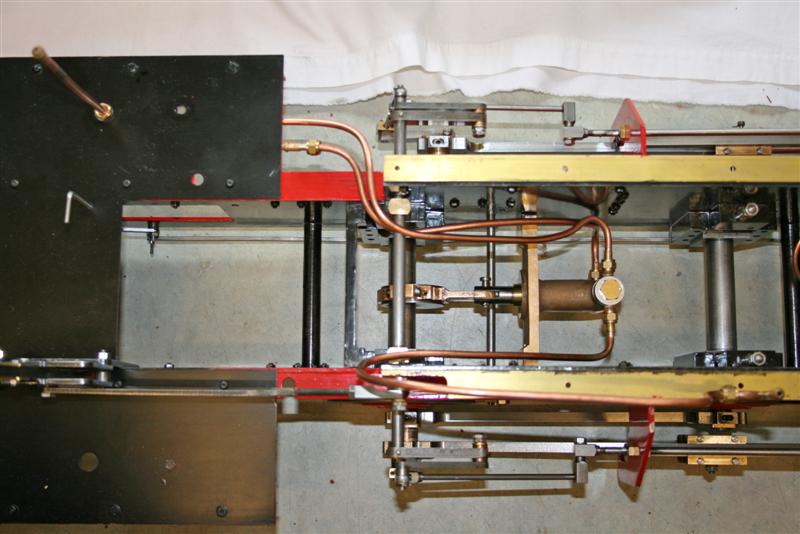
The instructions have arrived and the first job is to fit the axle pump piping so that I can then permanently fix the running boards in place in preparation for fitting the boiler and smokebox. Geerlig has provided photos to show the pipe runs, so all I have to do is bend the pipes which are already cut to length and fitted with olives and backnuts. But first I have to fit the pump banjos which had come with the pump way back in kit 2. The single port with the plain bolt goes on the bottom for the inlet, the double port with the castellated bolt on top for the boiler supply and the bypass, not forgetting the ball valve in each and the washers either side of the banjos.
Bending the pipes wasn't actually as difficult as I thought. I made one bend in the wrong end of a pipe and had to heat it up with a blowlamp to soften it up again, but apart from that it went very well. Having the side tanks to hand made things a lot easier as I could make the final bends to join up with them. I couldn't use the pipe bending springs I had bought as they wouldn't fit over the olives (should have thought of that) so I just used my fingers to carefully make the bends a bit at a time. The copper is very soft until you start bending it, it hardens the more you un-bend and re-bend it. The moral being, try to get it right first time! It took me most of the afternoon but I'm very pleased with the result. Here's a couple of pics.
September 5th
So the next job is to assemble the smoke box and its support cradle, fit the chimney, then mount the whole thing onto the boiler. Then the whole is then fitted to the frames except that mine wouldn't line up properly. After much faffing about, I discovered that despite my careful measuring, the steam and exhaust tees were not quite central and were pulling the smokebox sideways. A few minutes work with a round file to enlarge one side of the holes in the bottom of the smoke box and it slipped into place. The enlarged holes shouldn't be a problem as the whole thing has to be sealed up with fireclay in due course.
(Footnote: See October 16th on Kit 9.
Before bolting the smokebox down and moving on, you need to check that there is a sufficient gap between the boiler backhead and the footplate so that pipes from the injector to the boiler clack and steam supply to the whistle can be passed through later in the build. If not, you will need to file a cut out in the edge of the footplate as described in kit 9.)
I'm not sure how I'm going to get at the nut to join the superheater to the steam inlet tee as it's behind the exhaust tee. I'll leave that until I get to Peterborough. The smokebox cradle is then bolted down onto the front of the frames and that seems to be all that holds the boiler assembly in place at the moment.
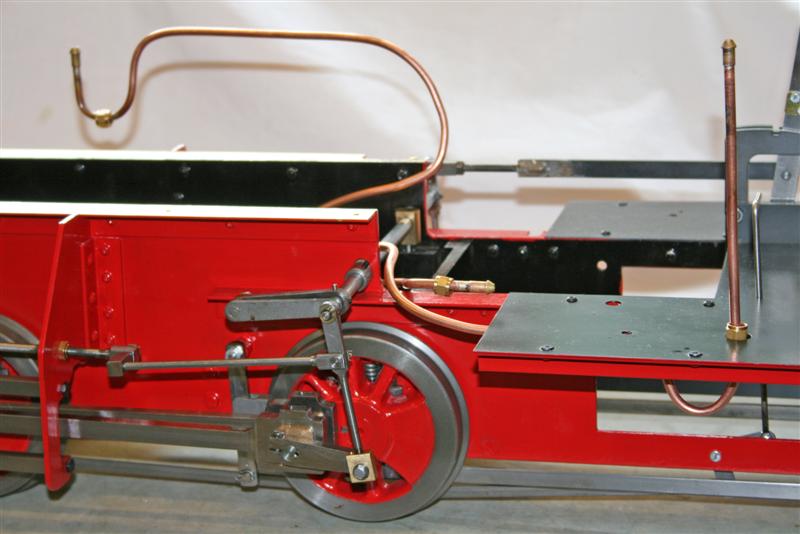
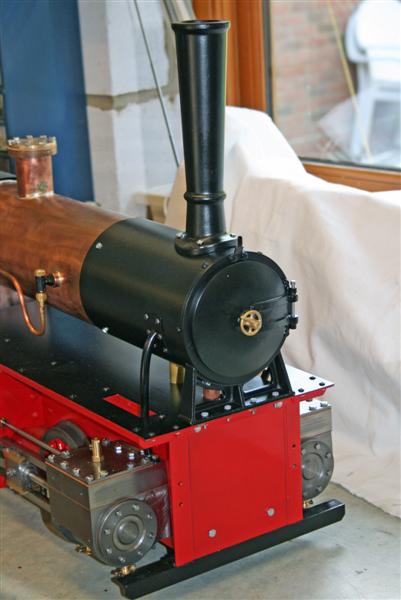
Next job was to fit the two dummy exhaust pipes - very fiddly to fit the retaining plates onto the cylinders, I should have fitted them before I bolted the running boards down, followed by the smoke box door. Finally.the clack valves to join up with the pump supply pipe, and eventually the hand pump in the side tank. Here's two pics of where we are today.
And then I discovered that the backnut of the pump feed pipe from the side tank had disappeared underneath and back down to the pump. After tipping the engine on its nose and persuading the wife to get her hands all oily to rescue the nut, I secured it with some tape so that it can't go missing again. I suggest you do the same before fixing the running boards in place!
I then moved on to some of kit 9 at this stage to see how far I could get before taking the engine to the Peterborough rally.
October 9th
The POG rally on September 12th was a great success. Geerlig and Andy and several of the Polly owners had a look at my efforts and were generally complementary. Picked up several useful tips and ended up feeling quite pleased with myself. It was made all the better by Geerlig very kindly letting me drive his Caroline. There are some pics on the gallery page.
October 12th
Back to the build and the first job was to undo much of the work I'd done for show at the POG rally. I first had to fit the boiler cladding spacers which arrived last week. This meant that the boiler had to come off the frames so that the smoke box could be separated from the boiler. The aluminium(?) cladding spacer for the smokebox needed some strong-arm un-bending work to reshape it as it was curved too tightly to simply slide on but eventually they were all in pace and I could reassemble the smoke box to the boiler.
Next job was to devise a way of tightening the connection from the superheater to the steam inlet tee. This sits close behind the exhaust tee with no room to swing a spanner so it was obvious that the exhaust would have to come out. No problem as I'd also removed the running boards to get at a water feed pipe that I'd put a kink into in the rush to get to Peterborough. With the kinked pipe sorted, the running boards back on and the boiler in place I could easily tighten the inlet tee connection.
The trouble started when I tried to get the exhaust tee back in place. I'd removed the front panel to get at the tee connectors but there wasn't enough room to twist the whole thing back in place. I removed the derailer bar and dropped the draincocks operating rod for better access but still couldn't quite get enough room for the twist as the connectors kept getting caught up in the cylinder mounting bolts. Had the exhaust been a straight pipe it would have been easy but there's this large bend in it which causes the problem. Eventually I removed one connector, raised the exhaust pipe as high as I could above the cylinder mounting bolts, refitted the connector and bingo! it just dropped in place. That process may work without removing the derailer bar and draincock rod - I didn't stop to find out but pushed on with the reassembly.
(Footnote November 21st: I understand that future kits will have the blast pipe in two pieces so that access to the superheater connection can be gained without having to remove the exhaust tee and blast pipe. This will be a major time saver at this point in the build)
Last job for this kit was the fitting of the boiler cladding. I've decided that I'm going ahead without painting at this stage so the cladding could be fitted. It's sprung over the boiler and lined up with the front cladding spacer in line with the leading edge of the cladding.
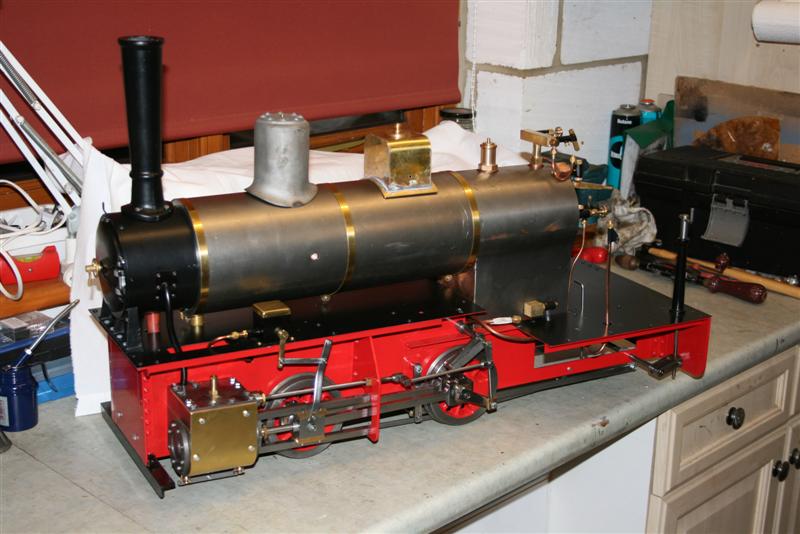
I used a combination of string, wire and some large electricians ties to get the cladding to bend around the boiler and stay put long enough to secure it with the boiler bands. The bands were a bit too long so I cut off one end of each, redrilled the holes and rebent them to get a better fit. This is what it looks like with the steam dome and sandbox from kit 10 just dropped on.
I just have to refit the boiler clacks and then it's on to kit 9.
Back to kit 7 Home On to kit 9