Geerlig's instructions suggest using an old chisel for the solder and an old file, with its end wrapped in sellotape to avoid digging in, for the screw heads. This worked very well provided I kept the chisel sharp, the tank clamped down securely, and my hands out of the way !! To finish off I used a 120 grade flapwheel to smooth off the file marks and give the tank a general clean up. Following that with a good rub down with 280 grade wet and dry paper.
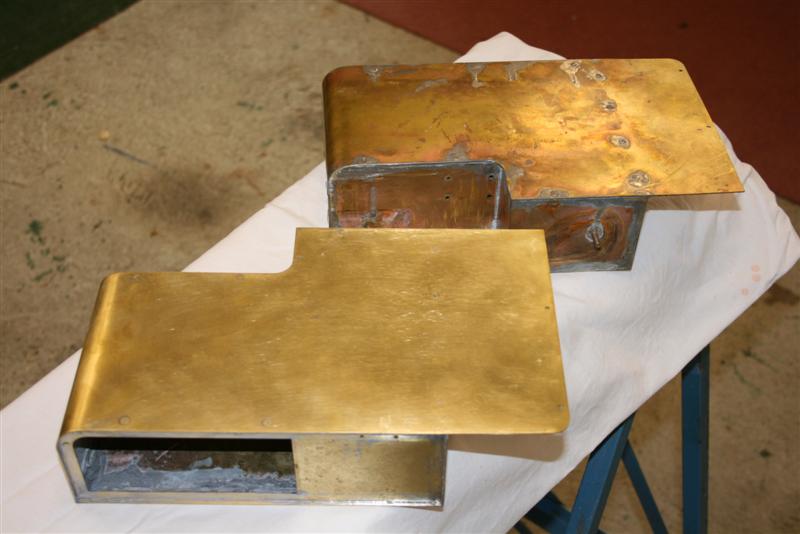
It's quite hard work that I spread over 4 afternoons - probably about 8 to 9 hours in total. To give you an idea of the task, here's a picture where the tank in the foreground is complete, the other awaiting attention.
I now need to fill in some screw head slots and a couple of minor digs and then I can put on a coat of etch primer.
January 2nd 2010
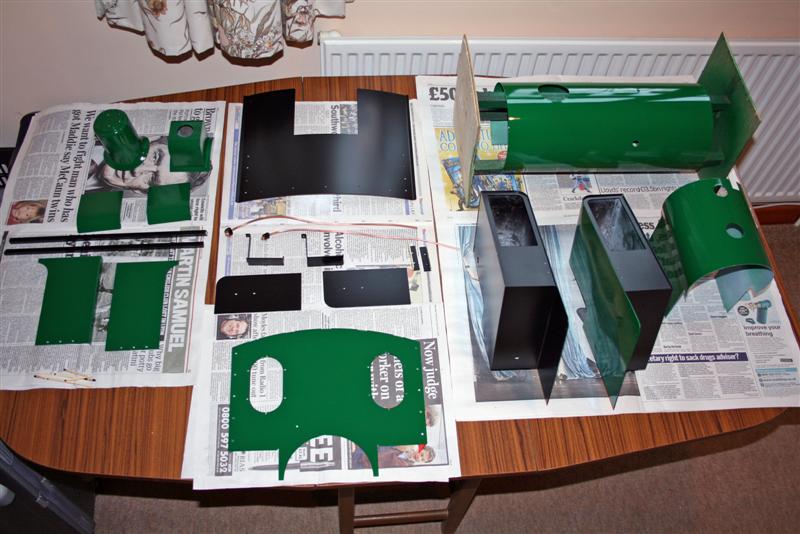
Over the past few weeks I have progressed to the point where the painting is finished!! Here are the parts all laid out while the paint hardens off enough to start reassembly.
Note the rough cradle for the boiler cladding that I made up so that I could rotate it as I sprayed it.
Along the way, I made a note of some things I would perhaps do differently another time.
If you follow my example of a headlong rush to get into steam before painting, I would suggest that a thin film of oil be wiped over the steel boiler and firebox cladding inside and out before first steam. In my case, water and steam got inside both claddings and had started to rust. It took a while to remove that rust from the surfaces before I could start with the primer. I also took up a friend's advice and painted the inside of the cladding to delay future rust.
I had originally intended to paint the engine by hand and had got as far as buying a very expensive sable brush and the enamel paints from Phoenix at the Guildford show. The more I looked at, and thought about, the large areas to be painted it became apparent that this was really a non starter and I foresaw lots of brush marks that would spoil the look of the model. Asking around friends I discovered that several had used the readily available PlastiKote spray cans sold by B&Q.
For the brass tanks and cylinder covers, I had bought some etch primer from Phoenix which I applied by brush (not the sable one!) This was more difficult than I had expected as it dries almost instantly. You are therefore left with drag marks on the surface you have just painted as it's almost impossible to keep a wet edge long enough to move on and paint the next area. As you can't rub down the etch primer (it would expose the brass again) I had to put on more coats of normal primer than I had hoped. There are about 5 or 6 coats on the outer sides of the tanks, which each had to be rubbed down to get a smooth surface and cover up the marks in the etch primer. I've since discovered that Halfords sell a spray-on etch primer and I think I would give that a go next time.
So, after the usual preparation and cleaning of all the parts, the spraying began. I used PlastiKote primer in both white and grey. For the satin black I kept to grey, but for the gloss green areas, I used alternate grey and white as suggested in an excellent little book published by Phoenix called, appropriately, "The Finishing Touch". By using alternate colours you can see how far you have rubbed down the latest layer as the previous layer begins to show through. I wanted to get the best finish I could for the gloss green so I found this tip very useful.
I put on two coats of paint allowing about 30 minutes between and I'm fairly pleased with the outcome. This was never going to produce an exhibition finish and after discovering that electric fan heaters blow dust around the garage producing specks on the surface of the cream inside the cab, I was a little more careful where I placed the parts to dry! The satin black covers most imperfections anyway, and once the gloss starts picking up the usual muck when running, I don't think the slight "orange peel" on some parts will show very much.
Today I've added a black border to the tanks using "Trimline" tape and I now need to go and buy some white to finish off the lining around the cab and tanks. I'm trying to copy the design used by the Valkenburg engine a bit ambitious maybe but I don't want single colour paint work.
Shouldn't take much longer to finish the paintwork and lining now and then we can begin the reassembly and look forward to running again.
January 12th
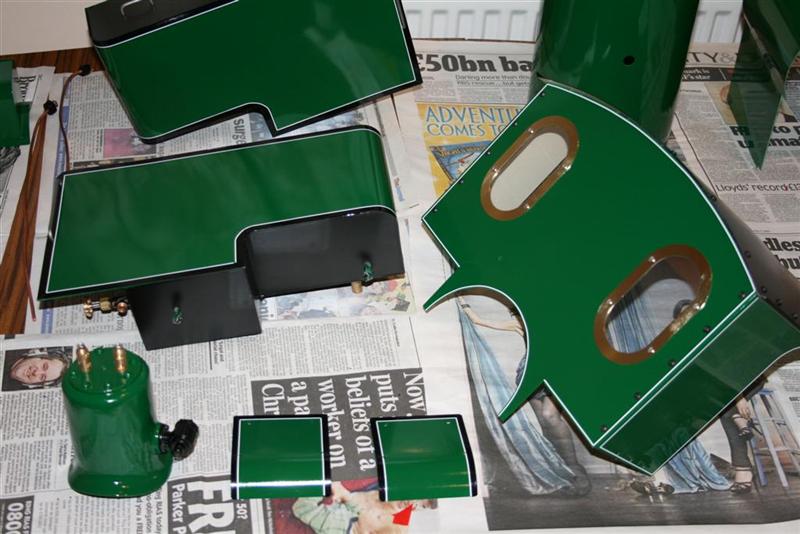 Finished painting and lining and have also now assembled the cab (note the window panes).
 The black and white lining is all done with Trimline self adhesive tape and took just a few hours and a sharp scalpel to mitre the corners.
I'm really quite pleased with the result.
Now that all the painting is completed, I'll return to Kit 10 pages to describe the final assembly. This should take place in the next few days as soon as the snowy weather lets up and Paul and I can get together to refit the boiler cladding. That will be a two handed job so that, hopefully, we don't get any scratches on the new paintwork when fitting the boiler bands. Check back later to see how we get on.
back to kit 9 Home on to Kit 10